home: made [ hallway hooks ]
Creativity and thinking out side the box can be stretched to any projects across the home.
Planning hallway hooks and storage can be an excuse to be quirky and fun, and you can design a system that not only looks good but works for your needs in the hallway – the room of the house that gets so much traffic and needs to function for accessible storage for coats, shoes, dog paraphenalia, shopping bags and all sorts.
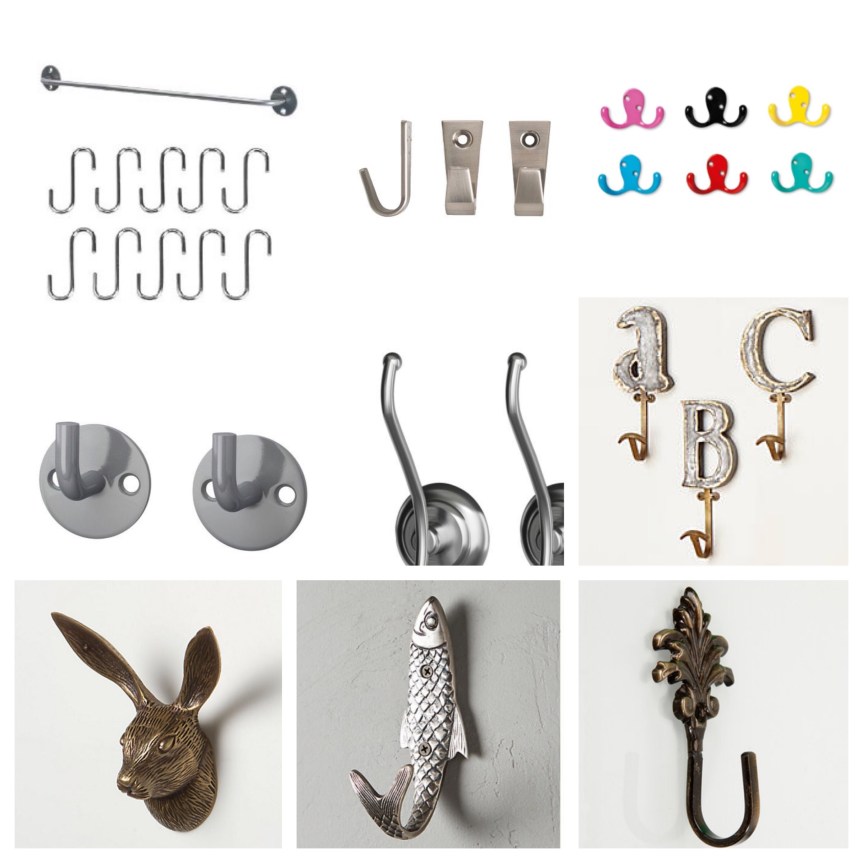
When planning your hook system search google, Pinterest and similar for ideas and inspiration. Think about the type of hook and the type of layout. Hooks can be classic in look but arranged in a quirky order – you don’t have to have them in a straight line. Hooks can be colourful, unusual or could be made from other items that produce something that can act as a hook. We found door knobs, cutlery and even a rake head used for hanging.

Explore DIY store hook departments for a mix of traditional or modern shaped hooks. Hang metal hooks on a coloured wall or make hooks stand out on a white wall by spraying the hooks in great colours. You could use shades of one colour or look to current colour trends for inspiration.
Visit homeware stores like IKEA, Anthropologie and Tiger for a great mix of great designs and more unusual hooks.
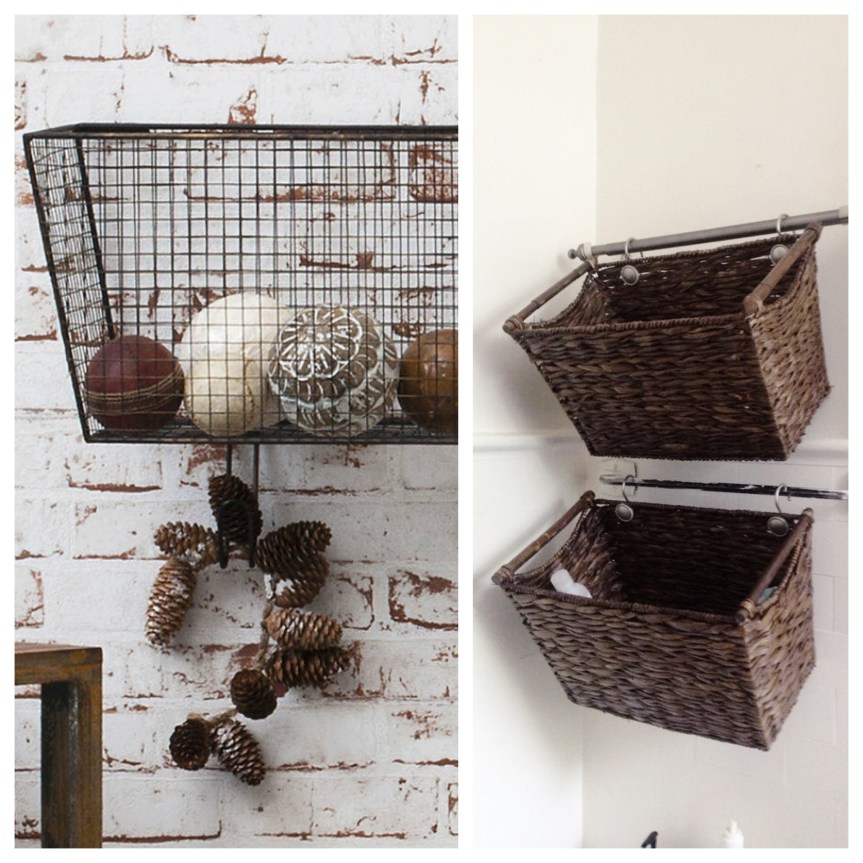
And hooks don’t have to be directly onto the wall but could be mounted on panels of wood, pallets or even coming down from the ceiling. You can also think about combining hooks and baskets for a flexible interchangeable storage system.
Explore EBay, Not On The Highstreet and Amazon for cool modern metal baskets, vintage style aged baskets, woven baskets and old, or made to look worn, crates for effective storage that can hang from hooks.
You can create an eclectic display mixing height and style and change according to your needs, and add more hooks and baskets when you need more space. And if the hooks are empty why not hang decorative accessories for a design feature. Hooks can also be personalised with letters or names on or above using stencils or stick on initials (we spotted some easy peal stick on letters from Tiger in a great font).
Make your hallway personal and make a statement with the first room people see in your home.

![home: made [ dipped spoons ]](https://anotherhomeblog.com/wp-content/uploads/2016/06/img_8801.jpg?w=863&h=0&crop=1)
![home: made [ paint drip vase ]](https://anotherhomeblog.com/wp-content/uploads/2016/05/1464109347081.jpg?w=863&h=0&crop=1)
![home: made [ hallway hooks ]](https://anotherhomeblog.com/wp-content/uploads/2016/05/img_8198.jpg?w=863&h=0&crop=1)


![home: made [ wall decor ]](https://anotherhomeblog.com/wp-content/uploads/2016/05/1462962902805.jpg?w=863&h=0&crop=1)
![home: made [ lanterns ]](https://anotherhomeblog.com/wp-content/uploads/2016/05/img_7554.jpg?w=863&h=0&crop=1)
![home: made [ hanging mirror ]](https://anotherhomeblog.com/wp-content/uploads/2016/04/1461762372646.jpg?w=863&h=0&crop=1)
![home: made [ feather light ]](https://anotherhomeblog.com/wp-content/uploads/2016/04/img_6787.jpg?w=863&h=0&crop=1)
![home: made [ wallpaper art ]](https://anotherhomeblog.com/wp-content/uploads/2016/04/1460497006844.jpg?w=863&h=0&crop=1)
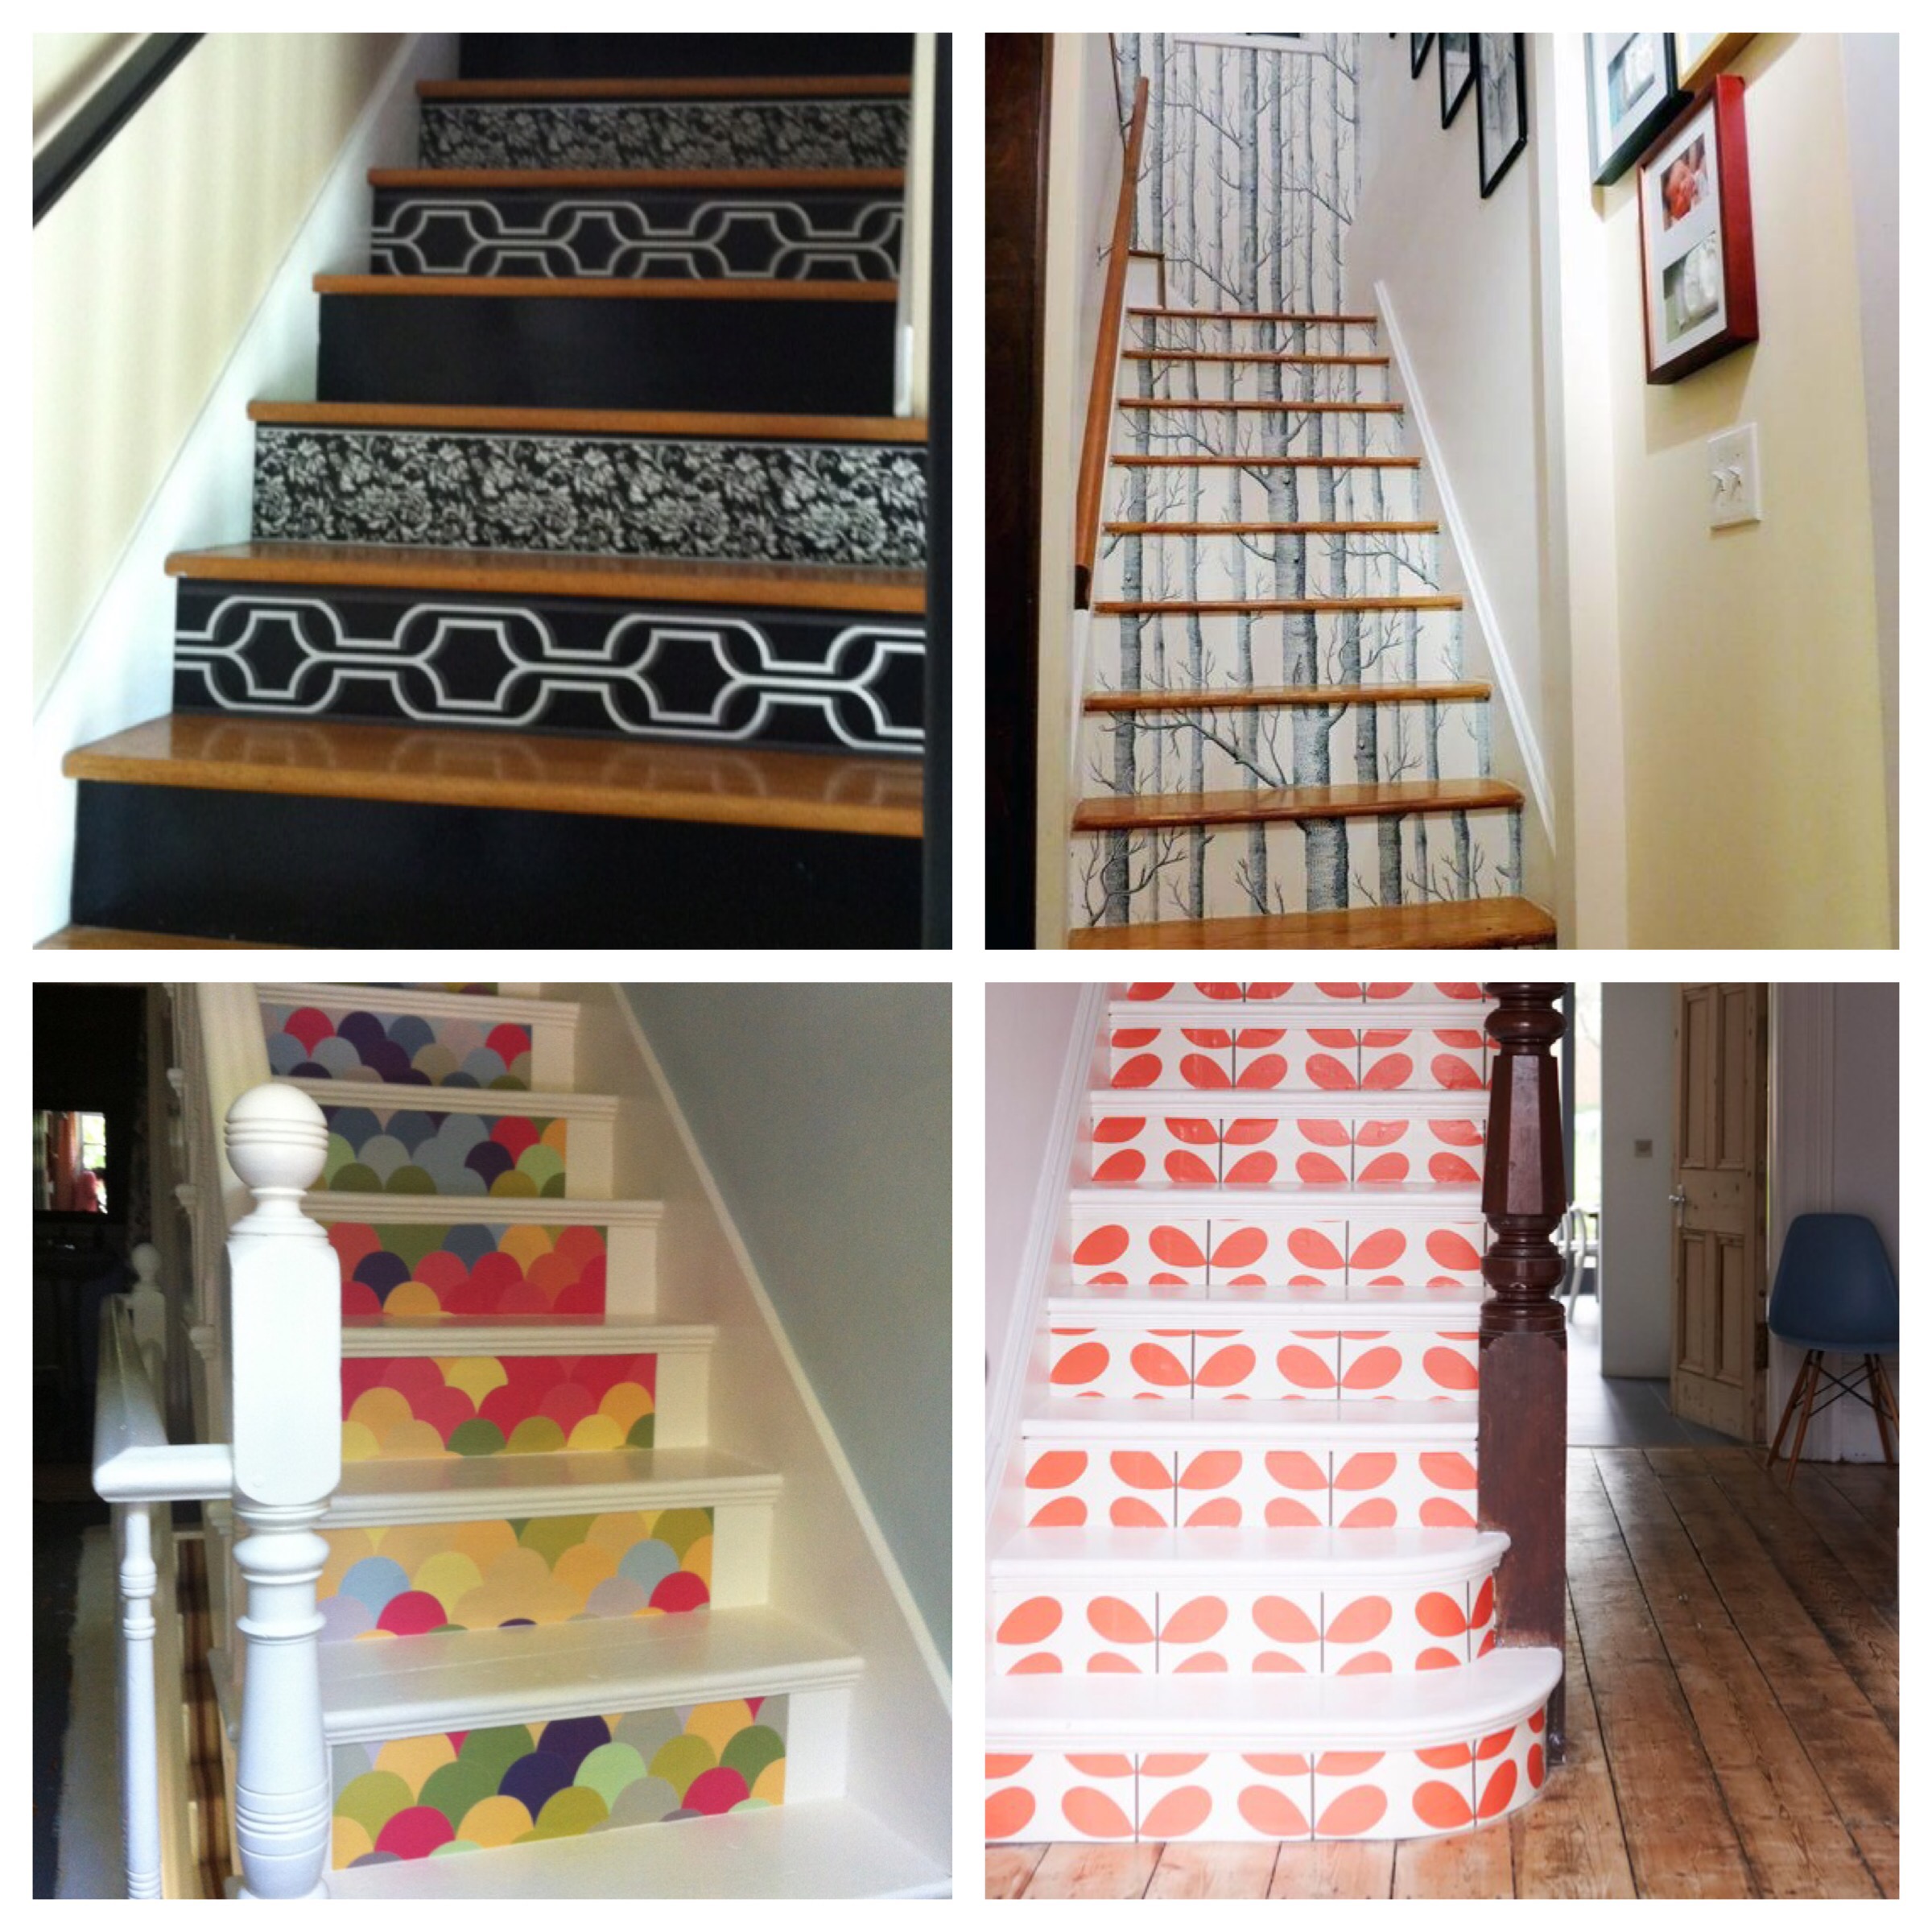
![home: made [ staircases ]](https://anotherhomeblog.com/wp-content/uploads/2016/04/img_5946.jpg?w=863&h=0&crop=1)
![home: made [ storage boxes ]](https://anotherhomeblog.com/wp-content/uploads/2016/03/1459327388571.jpg?w=863&h=0&crop=1)
